I shared this wonderful video over on my Facebook page where I am often as not found wittering on about linocuts, coffee and art to lust over, though not necessarily in that order as I notice the slice of life coffee now takes in my everyday existence.
http://www.wimp.com/beautifulbooks/ : How beautiful books were made in the 19th Century. (VIDEO)
Over this morning's cuppa I decided it was so full of magic that I needed to keep it safe and on display for any visitor to see. I hope you watch it. You don't even need to be a print-mouse in disguise, though a love of all things printed will guarantee a smile.
To me, it's special and I'd love to be that print-mouse in a mouse-run workshop full of other inky mice and this amazingly wondrous machine - the Linotype. Ahhh. Where the tick-tock of the clock drives me insane, I swear I could sleep to the whirrs and clicks of this beautiful creature.
It is indeed A Marvellous Mechanical Mouse Machine...and obviously, the workshop cat would be called Bagpuss.
Sunday 17 November 2013
Tuesday 5 November 2013
From idea to product. One golden tip.
General musings prompted by a number of very well-meaning requests for info on how I go about making my journals, sourcing materials etc.
These enquiries have taken me right back to how it felt when I first had the idea that I wanted to handprint journal covers too. It can all feel a bit overwhelming - where what when how? You know you want to do it but HOW?!
Apart from the obvious tips about making lists, breaking the task down into achievable goals etc I have one golden tip that I want to share and it's this: pick up the phone.
We all rely on the internet so much these days and feel certain that any question we have can surely be answered by a search on google. I do it myself. Until I get frustated that is. Then I start making phone calls and these are so much more useful...so really my tip is all about concentrated chat.
So for example you want to set up a stationery range then you will want to source papermills and speak to them - they're so friendly, usually small businesses (relatively speaking) and offer the personal touch. They can help you create your dream. What else - well you might need binders - again, ring them up, a lot are family run businesses and will remember your name. Don't be shy of sharing your real budget because then you can have a real conversation.
But it's there - in the conversation - that you will find the answers to your creative frustrations. You may even find that you can improve on your initial idea - I did and have plans for the future based around a relationship I have built up with my suppliers. They get involved, come up with ideas and we chat about them, go away and think then chat some more. I love it and am so glad that I still prefer the phone....sacrilege putting that into words on a blog but it's the truth. ;)
Pick up the phone - it's good to talk. And good luck with my warmest wishes.
Friday 4 October 2013
Libra, Virgo and Leo too...with just a little chat about working to a theme.
When I chose the zodiac theme for the monthly Prints for Press series this year, it seemed an obvious choice. Not because I particularly believe in the zodiac...I don't. No, I suspect I'm the same as many others and perhaps more tolerant of the whole shebang than a good deal more. I remember learning all about them as a child - oof, and lets not dwell too long on the teenage years of working out with friends our best love matches, sweep that one under the memory rug!! - and have had a soft spot for the general characterisations ever since. The fact that a lot of the character portraits are scarily accurate (even allowing for the whole 'well it could apply to anyone' angle) is neither here nor there - I like them because they are, by and large, an affectionate whimsical blast of friendly air, and I've always got space for a little whimsy in my life.
What I didn't know when I started the series was just how much I would relish being forced to consider subjects that I wouldn't ordinarily choose to draw let alone commit to linocut. I have particularly liked trying to deal with the difficult astrological customers where perhaps the image didn't come too easily...Scorpio and Sagittarius are still lying in wait, so perhaps I shouldn't speak too soon.
Zodiac round up of the most recent signs in linocut, introducing Leo, Virgo and Libra. x


Monday 30 September 2013
Shhhh. Just popping in for a minute.
Am a busy squirrel gathering nuts and stashing them in places I shall no doubt forget about when the frost bites.
Latest in the stash of zodiac linocuts is this boy, strongman, paper strongman puppet....for Libra, Balancing Act Extraordinaire:

Now then. Back to collecting nuts. And no - not a word about how long it is since I last posted. This squirrel's been lost in the dark woods of cyber space, but am back in the park now and I'll see you later in the week with more info about my plans. Thanking you. Squirrel-style.
Friday 17 May 2013
Not lost simply mislaid
Still here! I have been very busy carving and printing new works and here's a bit of gallery update:


 And that's not including the new journal cover prints but I'll save those for when the new range is out! The zodiac series has been really good fun to do and a real challenge - I think having an imposed subject matter (at least to some extent) has helped me to ensure that my own style is there in each work so that they are still very much mine - I have loved this tension between subject and style and am going to hang on to one of each print so that I will have a full collection at the end of it all.
Happy printing. Find your own style and let it shine through everything.


Happy printing. Find your own style and let it shine through everything.
Thursday 7 March 2013
I'm In A Book!
I thought about fancier titles - perhaps with a hint of sophistication? Or at least less gauche? Nope. I am just THRILLED!!!! The gorgeously lovely and extrememely hard-working Maria Arango Diener not only orchestrated a wonderful international project in the City of the World Monumental Collaborative Puzzle Print - she also had a book published showing everyone's work!!!

The prints themselves make for a HUGE puzzle print spread over 5 sheets!- I have yet to frame mine, I think I need a bigger bit of free wall first. As and when I do ever get it framed and up on a wall I promise to show the pictures here.Here's just a glimpse of them when they arrived last year with a complete image and key in the foreground:

Here's my page - so so so doing a little happy dance. I don't know exactly why it is so exciting to be in a book, I have never yearned for fame so it's not that. Maybe it's something to do with feeling validated in some way - daft, this was all voluntary participation - but I rubbed shoulders with some very experienced woodcutters and engravers in the process, so that felt pretty bloody wonderful too.

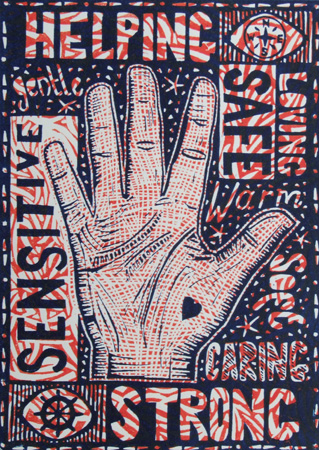
The figure in my block does not represent me as such. I had in mind to portray us all. A simple figure just watching the birds, finding peace, nature and connection where he or she can. Without the birds, I'd have to move.
In the background you can just see faded images from the newspaper cutting I included with my block. We all did this - mine reflected the on-going financial crisis affecting us all, some so very much more than others, which I contrasted with some, ahem, fairly rum views (in my not always very humble opinion) from our current 'leader'. Hrmph.
The book also features a whole bunch of process shots (I personally love these) with the team of volunteers who did such hard work over the whole thing including the printing days.I know I shall keep coming back to it time and again.
I would love to do something like this again. That Maria would too is amazing, and this wasn't even her first monumental puzzle project. Nonetheless, she ends the book with 'Follow the blog for announcements about the next great project! Until then.' - I can't thank her enough.
Hehe. Am in a book. Who'd have thought it. :D
Maria's blog can be found here: http://puzzleprints.blogspot.co.uk/

The prints themselves make for a HUGE puzzle print spread over 5 sheets!- I have yet to frame mine, I think I need a bigger bit of free wall first. As and when I do ever get it framed and up on a wall I promise to show the pictures here.Here's just a glimpse of them when they arrived last year with a complete image and key in the foreground:


The figure in my block does not represent me as such. I had in mind to portray us all. A simple figure just watching the birds, finding peace, nature and connection where he or she can. Without the birds, I'd have to move.
In the background you can just see faded images from the newspaper cutting I included with my block. We all did this - mine reflected the on-going financial crisis affecting us all, some so very much more than others, which I contrasted with some, ahem, fairly rum views (in my not always very humble opinion) from our current 'leader'. Hrmph.
The book also features a whole bunch of process shots (I personally love these) with the team of volunteers who did such hard work over the whole thing including the printing days.I know I shall keep coming back to it time and again.
I would love to do something like this again. That Maria would too is amazing, and this wasn't even her first monumental puzzle project. Nonetheless, she ends the book with 'Follow the blog for announcements about the next great project! Until then.' - I can't thank her enough.
Hehe. Am in a book. Who'd have thought it. :D
Maria's blog can be found here: http://puzzleprints.blogspot.co.uk/
Sunday 3 March 2013
A very chatty guide to sharpening tools for the fainthearted.
Sharpening tools when you have never done it before can be a bit overwhelming - at least it was for me. Printmaking is one of the geekiest corners of the artworld (we have the equipment and processes as well as the art!) and I have seen and read of different methods right down to which direction to push or pull the blade in.
My conclusion, before I even start is, yes you may not get it perfectly right, but that there isn't really a wrong either. Mind you, you will definitely find people to tell you otherwise. Have a go, your tools will not break even if they need a little love after their first encounter with your sharpening efforts.
I'm writing this mostly for those who are perhaps reluctant to buy individual tools because of the need to sharpen them. I'm also writing it for those who have got their tools but wait until someone else is around to sharpen them - this means that half the time they are probably using blunt tools.
If I can do this and not totally mess up, then so can you. I am sure others can do it better, but they haven't put their hands up to be my assistant and I can only improve!
Why bother?
Because sharp tools are safer and easier to use and because individual tools offer efficiency (no need to switch blades as you go along), there are more blade options than the economy range, they are better quality, enhancing the carving experience and will last you a very long time with good care.
When?
Little and often. It's the second favourite answer to a lot of questions these days, after switch it off then switch it on again. But it's true. I honestly think that a quick session sharpening your tools when you sit down to carve for the day is a good idea. It only takes a few minutes and gets easier with practice. If you are carving a lot with one tool, then you may well need to resharpen during a session - I promise it only takes a moment and then you're off again.
Other times will arise - to deal with repairs for example - a dropped or knocked tool can easily sustain a nick in the blade. Don't be afraid of 'wrecking' your tools - they can be reshaped and sharpened. Just takes a bit longer.
What equipment?
Stone
Leather
Honing paste
Lubricant - water or sharpening stone oil
First of all you will need something on which to sharpen your tools. There are oil, water and diamond stones. I was a little intimidated by the choices and went for a diamond sharpener that comes in a credit card size and shape - nice and compact to carry around and not too expensive either. I get along very happily with this although must admit that I would now be comfortable using something like a series of small stones in varying grades available through printmaking suppliers. These also have edges shaped to help with removing burrs and would be better for more involved repairs.
Basic rule of thumb is that you start with coarse grades and move through to fine. I just use a diamond sharpener - remember, I wanted to keep it simple and this works for me.
Depending on your choice of stone you will probably need to add water or oil (some diamond sharpeners state that no water is necessary). The water or oil acts as a lubricant. I use a dab of water on my sharpener and this does the trick. I have tried it without water, and whilst it works for a quick sharpen, adding the water does make a difference (I must like learning things the hard way).
How?
There are 3 main gouge types that you are likely to use straight off - the V, the U and the shallow gouge. Each of these has a bevel at the very tip of the cutting edge and you need to locate this first. Every time you want to sharpen your tool you will need to lie this bevel edge flat on your sharpening stone/steel so it's a good idea to have a little feel for it - in the end the angle should become quite natural. It is very good advice that you should try to protect the bevel edge but don't panic if you haven't already done that - just create one - it probably won't look quite as pretty as when the tool is first machine sharpened, but that's ok. Also, bear in mind that people are all different and we like holding the tools in our own ways too - so deep or shallow angles is really down to the individual. It'll carve like a dream if it's right for you.
The V gouge
So called because it looks like a V...and so on for the others.
Step 1 - Sharpen:
With these blades you will see that there are 2 flat sides to sharpen. Simply find your bevel, place flat on the stone and PUSH away from you maintaining a constant angle and direction away from the body. This is the main trick - keep it flat on the stone and you'll be alright. Remember I am writing this for people like me - I didn't have a clue when I started and it was damn hard getting anyone to point out the obvious. I wanted the obvious. I needed it. So here it is - push/glide and repeat. Keep checking the bevel and feel the edge to see how it's going. Watch out for any uneven pushing as this will very quickly affect the line and shape. Do a little, check and do a little more. See, it's easy really. Be confident and smooth, you will be fine.
Which direction? Honestly, seasoned expert fully paid up geeky printmakers will swear to this - push. No, pull. No, push and pull. Seriously, I have checked and rechecked. So I got brave. I have tried all of them. Uhhuh. I have. My tools are still fab. There were no bolts of lightning. I now consistently push away to sharpen and pull to hone. There, said it. But I'm less geeky than some and will allow that your method works better for you. ;)
Repeat for both sides of the V.

Step 2 - the burr:
Dealing with any burr created on the inner edge of the blade. Keep a strip of fine grade sandpaper folded in your tool box, nice and worn is good, and this will take off any burr created on the inner sides with barely a flick.
Step 3 - Honing/polishing:
A leather strop is needed for this - I ordered mine from TN Lawrence but am sure you needn't. I got it at the same time as the honing paste which actually looks like a block. I had to guess what you do with it because again, nobody thinks you should buy these things unless you already know what to do with them. We have instructions on EVERYTHING except sharpening equipment. Maybe it was just mine eh. It's a geek conspiracy.

Right, get your honing paste and rub it hard over the leather to create a nice creamy layer. Take your nicely sharpened, de-burred (if necessary) bevelled edge and PULL towards you to polish out any roughness to your new edge. This doesn't take long and will turn the paste to a dark grey with each stroke.

Take at look at your blade now - it's all shiny and lovely and raring to go.
The U and Shallow Gouges
The steps above are all the same except for the way to move the edge over the sharpening stone. Again, I have come across various ways - the corkscrew spiral, the figure of eight, the oval/circle. Or mine - forwards with a touch of the oval. What they all have in common, is that you need to rock the blade gently from side to side to ensure even and full sharpening. This takes a little more practice at the outset, but I now find this one the easiest to sharpen.

I used the corkscrew but had a bit of a disaster with it - but hey, I got my beautiful U back with some steady and consistent sharpening using my now trusted and simple method. It works for me.
The main message in all of this is HAVE A GO. It'll be fine. I promise.
My conclusion, before I even start is, yes you may not get it perfectly right, but that there isn't really a wrong either. Mind you, you will definitely find people to tell you otherwise. Have a go, your tools will not break even if they need a little love after their first encounter with your sharpening efforts.
I'm writing this mostly for those who are perhaps reluctant to buy individual tools because of the need to sharpen them. I'm also writing it for those who have got their tools but wait until someone else is around to sharpen them - this means that half the time they are probably using blunt tools.
If I can do this and not totally mess up, then so can you. I am sure others can do it better, but they haven't put their hands up to be my assistant and I can only improve!
Why bother?
Because sharp tools are safer and easier to use and because individual tools offer efficiency (no need to switch blades as you go along), there are more blade options than the economy range, they are better quality, enhancing the carving experience and will last you a very long time with good care.
When?
Little and often. It's the second favourite answer to a lot of questions these days, after switch it off then switch it on again. But it's true. I honestly think that a quick session sharpening your tools when you sit down to carve for the day is a good idea. It only takes a few minutes and gets easier with practice. If you are carving a lot with one tool, then you may well need to resharpen during a session - I promise it only takes a moment and then you're off again.
Other times will arise - to deal with repairs for example - a dropped or knocked tool can easily sustain a nick in the blade. Don't be afraid of 'wrecking' your tools - they can be reshaped and sharpened. Just takes a bit longer.
What equipment?
Stone
Leather
Honing paste
Lubricant - water or sharpening stone oil
First of all you will need something on which to sharpen your tools. There are oil, water and diamond stones. I was a little intimidated by the choices and went for a diamond sharpener that comes in a credit card size and shape - nice and compact to carry around and not too expensive either. I get along very happily with this although must admit that I would now be comfortable using something like a series of small stones in varying grades available through printmaking suppliers. These also have edges shaped to help with removing burrs and would be better for more involved repairs.
Basic rule of thumb is that you start with coarse grades and move through to fine. I just use a diamond sharpener - remember, I wanted to keep it simple and this works for me.
Depending on your choice of stone you will probably need to add water or oil (some diamond sharpeners state that no water is necessary). The water or oil acts as a lubricant. I use a dab of water on my sharpener and this does the trick. I have tried it without water, and whilst it works for a quick sharpen, adding the water does make a difference (I must like learning things the hard way).
How?
There are 3 main gouge types that you are likely to use straight off - the V, the U and the shallow gouge. Each of these has a bevel at the very tip of the cutting edge and you need to locate this first. Every time you want to sharpen your tool you will need to lie this bevel edge flat on your sharpening stone/steel so it's a good idea to have a little feel for it - in the end the angle should become quite natural. It is very good advice that you should try to protect the bevel edge but don't panic if you haven't already done that - just create one - it probably won't look quite as pretty as when the tool is first machine sharpened, but that's ok. Also, bear in mind that people are all different and we like holding the tools in our own ways too - so deep or shallow angles is really down to the individual. It'll carve like a dream if it's right for you.
The V gouge
So called because it looks like a V...and so on for the others.
Step 1 - Sharpen:
With these blades you will see that there are 2 flat sides to sharpen. Simply find your bevel, place flat on the stone and PUSH away from you maintaining a constant angle and direction away from the body. This is the main trick - keep it flat on the stone and you'll be alright. Remember I am writing this for people like me - I didn't have a clue when I started and it was damn hard getting anyone to point out the obvious. I wanted the obvious. I needed it. So here it is - push/glide and repeat. Keep checking the bevel and feel the edge to see how it's going. Watch out for any uneven pushing as this will very quickly affect the line and shape. Do a little, check and do a little more. See, it's easy really. Be confident and smooth, you will be fine.
Which direction? Honestly, seasoned expert fully paid up geeky printmakers will swear to this - push. No, pull. No, push and pull. Seriously, I have checked and rechecked. So I got brave. I have tried all of them. Uhhuh. I have. My tools are still fab. There were no bolts of lightning. I now consistently push away to sharpen and pull to hone. There, said it. But I'm less geeky than some and will allow that your method works better for you. ;)
Repeat for both sides of the V.

Dealing with any burr created on the inner edge of the blade. Keep a strip of fine grade sandpaper folded in your tool box, nice and worn is good, and this will take off any burr created on the inner sides with barely a flick.
Step 3 - Honing/polishing:
A leather strop is needed for this - I ordered mine from TN Lawrence but am sure you needn't. I got it at the same time as the honing paste which actually looks like a block. I had to guess what you do with it because again, nobody thinks you should buy these things unless you already know what to do with them. We have instructions on EVERYTHING except sharpening equipment. Maybe it was just mine eh. It's a geek conspiracy.

Right, get your honing paste and rub it hard over the leather to create a nice creamy layer. Take your nicely sharpened, de-burred (if necessary) bevelled edge and PULL towards you to polish out any roughness to your new edge. This doesn't take long and will turn the paste to a dark grey with each stroke.

Take at look at your blade now - it's all shiny and lovely and raring to go.
The U and Shallow Gouges
The steps above are all the same except for the way to move the edge over the sharpening stone. Again, I have come across various ways - the corkscrew spiral, the figure of eight, the oval/circle. Or mine - forwards with a touch of the oval. What they all have in common, is that you need to rock the blade gently from side to side to ensure even and full sharpening. This takes a little more practice at the outset, but I now find this one the easiest to sharpen.

I used the corkscrew but had a bit of a disaster with it - but hey, I got my beautiful U back with some steady and consistent sharpening using my now trusted and simple method. It works for me.
The main message in all of this is HAVE A GO. It'll be fine. I promise.
Subscribe to:
Posts (Atom)